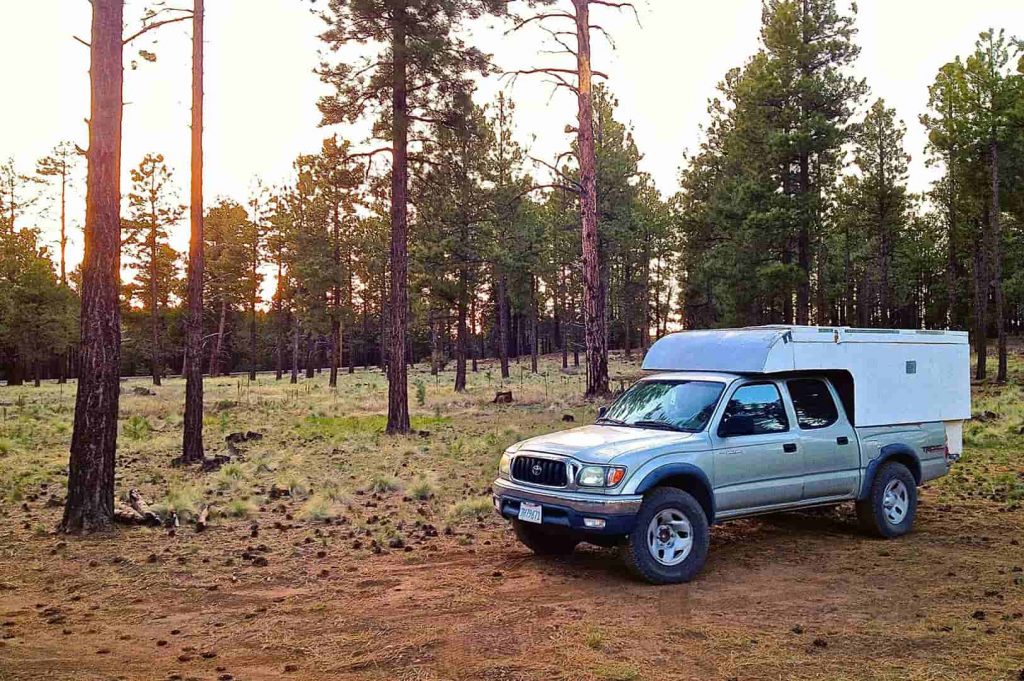
Anyone who loves to go camping or wants to explore their country must love the idea of a truck camper. It’s literally like carrying your home on the back of your car. However, a new truck camper will set you back for several thousand dollars. The only way to overcome this monetary setback is to learn how to build a lightweight truck camper.
A camper could be a good choice if you like camping but don’t want to stay in a tent. Although it’s more like a tent on wheels, you don’t need to set and pack it up every day.
Contents
How to Build a Lightweight Truck Camper
Despite having a pretty straightforward structure, a truck camper does not come cheap. For this reason, building a DIY truck camper seems to be the perfect option.
With a little carpentry skill and the help of this guide, you will be able to pull this DIY project up in your garage.
Materials for Building a Truck Camper
- Wood planks (ideally, 2×2 or 2×4 lumber)
- Wooden beams
- Plywood boards
- A ready-made roof
- Foam or cotton insulation
- PVC sheathing
- Bubble wraps for air-proofing the interiors (optional)
- Metal joints
- Hammer
- Drill machine
- Nails
- Measuring tape
- Weatherproof tape
Besides, you must have protective gear, including goggles, gloves, and facemask, and wear them while working.
Procedures for Building a Truck Camper
The first thing you should do for how to build a lightweight truck camper is to cover your truck with a protective thick plastic layer. It will save the vehicle from unintentional damage. Remember that the insurance is unlikely to compensate for the damage happened because of remodeling.
Set up the bases
Take the measurement of the open cargo bed of your truck to determine the length and width of the camper. After calculating the right size, start building the main support for the framework.
Secure the metal joints with the sides of the truck and attach them to the wooden beams. Use nuts and nails to create a firm bonding. Set up wooden planks on the truck bed and sides and use quality screws and adhesive so it does not get loose with bumps and jolts.
You can either bolt down the base to the cargo bed or set up a latch system and mount the base on it. The latter will make it easier and quicker to take out the camper should you need that in the future.
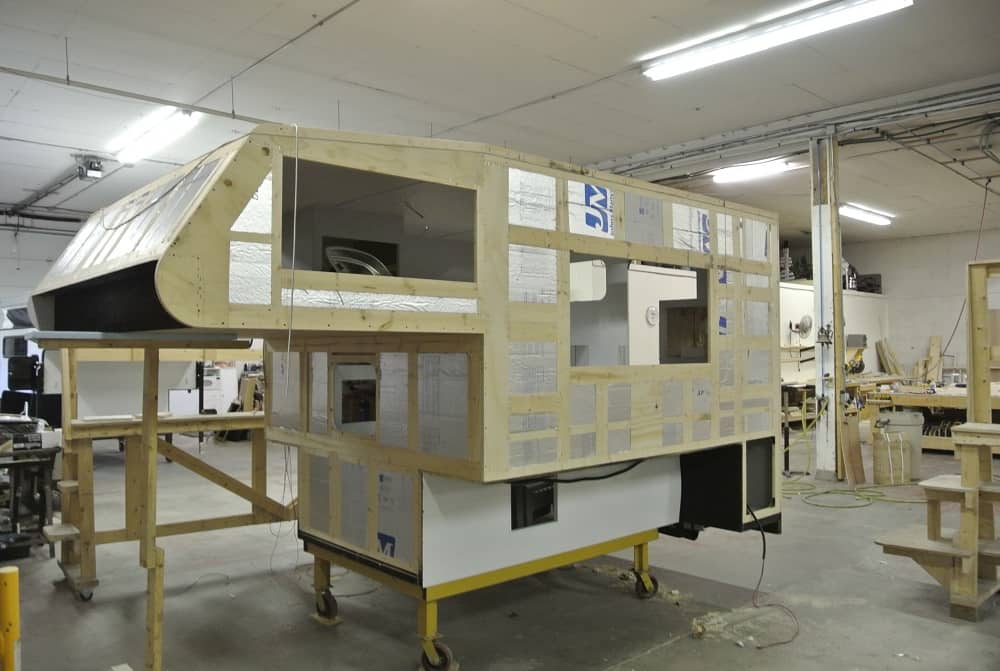
Attach the frames and roof
Once the base is set, you can move to assemble and attach the frames. The process is simple if you already have a design in mind. For doing this more efficiently, draw the outline on a piece of paper, ideally with measurements, and follow that when jointing the beams together.
Chip and interconnect the wooden beams and use enough nails and bolts for a strong connection. If budget is not a problem, use aluminum beams for a sturdier yet lightweight framing.
Move to install the roof then. It’s not difficult if you have already bought a ready-made roof. The material can be rubber, corrugated tin, or fiberglass and you can choose a carved or triangle shape. Secure it to the frame as tightly as possible and seal the edges with weatherproof tape.
Add the insulation and walls
Now, it’s time to add walls to the skeleton. Plywood boards would be the best option to support the somewhat wobbly frame. Of course, only plywood panels won’t complete the exterior finish of the camper.
The walls need to be securely attached to the framing. Use enough adhesive and screws for that purpose. The stronger the structure is, the longer the truck camper will last.
Once the walls are fixed to the frame, cut openings for windows and a door. You can do this before attaching the plywood boards. Then, attach the door and window frames.
Electrical wiring
To run the electronic devices, you can use a solar panel or a combination of 12V and 110V systems.
You can install the solar-powered system on the roof and run the wires through inside the walls. You may also leave the wires exposed, but that could be dangerous, increasing the chances of electrocution.
A 12V system draws power from one or multiple battery units and supplies it to the appliances. The batteries receive charges from the truck engine when it runs or an external 110V power source. You can use an inverter for converting 12V into 110V power for operating some devices such as a microwave, coffee maker, or phone charger.
For drawing power from an external 110V outlet, you will need to install a breaker box outlet inside the camper.
Install the plumbing
Installing the water and disposal system is another important step of how to build a lightweight truck camper.
However, most people choose not to install the toilet for space imitation. If you must have one, a composite RV toilet could be a good but expensive option because it does not need any plumbing. For a standard RV toilet, you have to connect it to a dumping tank that should have an easy detaching system so you can dump the waste at designated stations.

A small sink would be handy. The water can be dumped into a bucket or a gray water tank. You can reserve the freshwater into a bucket. People experienced with plumbing can install a small RV water pump. Use PEX plumbing pipes for a better result.
Insulate the camper
Insulate the floor and inside walls with foam panel boards or a layer of PVC sheathing and then apply a layer of plywood. These layers should be tightly attached together with adhesive and bolts and screws to maintain the structural integrity.
Then, apply a layer of cotton and bubble wrap across the dimensions of exterior walls. Be careful about sealing all the joints to protect the interior from outside elements. Finish the exterior insulation by pressing a layer of plywood onto the insulation materials.
Finish the project of how to build a lightweight truck camper by applying a coat of wood polish or paint on the plywood surfaces.