Considering the size of most RVs, the water systems within them are quite impressive. The ability to take warm showers, use the toilet, and wash the dishes – all in a compact space – comes with an intricate design of water lines that carry water to, and away from your RV. Since this system is so intricate, it also requires a fair amount of maintenance to ensure the water pipes will continue to function properly.
The low point drain valve on your travel trailer is an integral component in the maintenance of your RV. Knowing where it’s located, as well as when and how to use it, is key to the longevity and liveability of your rig.
Let’s dive into what an RV low point drain valve is, how to use it, and where you can find it on some of the current market’s most popular camper brands.
Contents
- What is an RV Low Point Drain Valve?
- Why Should You Drain Your RV Water Lines?
- Winterizing Your RV Drain Lines
- Where are the Low Point Drain Valves Located?
- How To Extend Your Low Point Drain Lines
- How to Open Low Point Drains on an RV
- Closing RV Low Point Drains
- How to Drain Your RV Fresh Water Tank
- How Do You Drain Your RV Water Heater?
- Conclusion
What is an RV Low Point Drain Valve?
An RV low point drain valve is a pair of small, indiscriminate drain tubes located underneath your RV at its hypothetical “lowest point.” The primary purpose of this low-point water valve is to give the RV owner the ability to completely drain their lines.
Depending on the size of your rig, you may have multiple low-point drain valves, and they may be marked in different colors. Reading your owner’s manual is the best method of determining where your low point drains are located, as well as how many there are.
Why Should You Drain Your RV Water Lines?
Draining your RV water lines serves multiple purposes. One of the main reasons is to prevent the buildup of gunk and stale water within your water lines. Letting water sit in low points for too long will eventually lead to unpleasant odors that seep up your water lines into the cabin of your travel trailer. By doing a frequent flush of your water system, you’ll keep the tubes clean and odor-free.
While frequent drainage is recommended to keep the overall health of your RV in good shape, the most crucial reason is for winterization purposes. If you plan on letting your RV sit over the winter, or you just plan on camping in colder climates, you must take preventative action to prevent your pipes from freezing.
Emptying your water tanks is simply not enough. RVs are designed so that water flows by gravity to the lowest points. Even if your freshwater tanks, grey, and black tanks are empty, there is still guaranteed to be some water left in the pipes. By opening your low point drains, you ensure that every little bit of water is removed from the system.
Winterizing Your RV Drain Lines

As mentioned, opening your low point drain valves is primarily used for winterization. If stale water is left in your RV’s water system over the winter, it can very easily crack the pipes, leading to expensive repairs when you return in the spring.
When winterizing, simply opening your drain valves and letting the water flow is not enough. You’ll either need to push all of the water out with air compression or dump a sufficient amount of antifreeze throughout your system. In an ideal situation, the low point drain on your RV would truly empty all of the water, but travel trailers are not often engineered in the most comprehensive way. By pushing air through to flush out the tubes, and by adding antifreeze, you’ll be positive that your water system will stay intact throughout the winter.
Another great method for emptying all of the water is to first open your low point drain valves, then go throughout the camper and turn on every faucet and flush every toilet. This creates a siphon of sorts, allowing the maximum amount of water to drain from the low points as efficiently as possible.
Where are the Low Point Drain Valves Located?
The location of your RV low point drain valve depends on a variety of factors. Not each camper is made the same, and it’s important to understand that your drain valve will likely be in a different location than your neighbors.
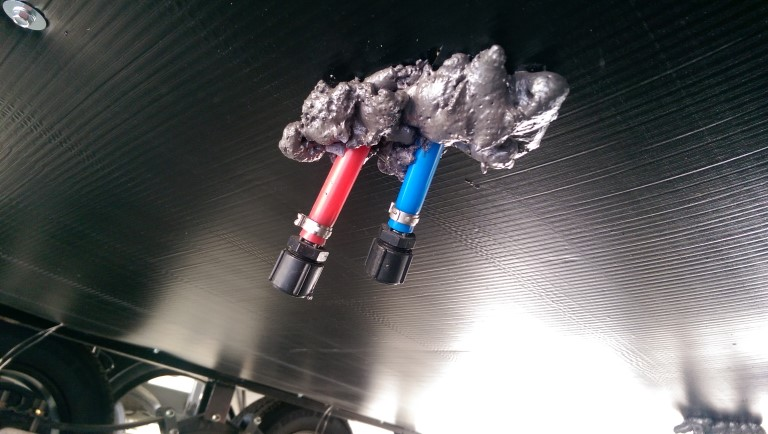
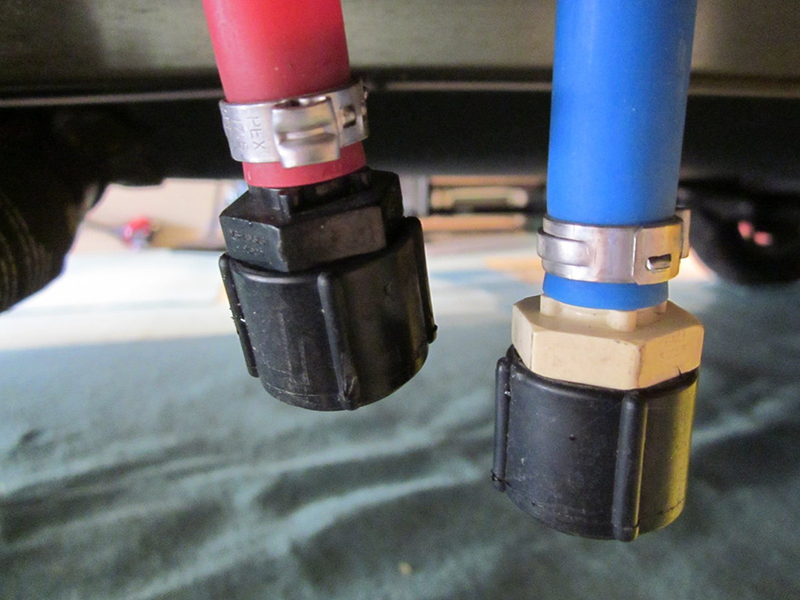
Low point drain valves are often fairly easy to spot by inspecting underneath your travel trailer. They are almost always plastic (PEX) tubes that hang from the undercarriage. They’re usually located near or underneath your fresh water tank and will be color-coded as blue, red, or grey/white. Blue valves correspond to your freshwater lines, red to your hot, and grey/white for your freshwater tanks.
Keep in mind this is just a generalized guide. Let’s dive into some specific travel trailer brands for a more accurate drain valve location.
Forest River RV Low Point Drain Valve
Most Forest River RVs have one setup of low-point drain valves, marked by a blue and red tube. These have twist valves attached already, and the operation is extremely simple – just twist valves counterclockwise and let the water flow out.
To drain the fresh water tank on a Forest River, you must unscrew the cap attached to a white hose that is located underneath the fresh water tank.
Jayco Low Point Drain Valve
A Jayco RV low point drain system is a little more unique than other rigs. In some models, there is a removable panel on the interior floor (normally near the fresh water tank) that houses two T-valves. To drain the low points of the camper, simply pull up on these two valves (normally blue and red) to begin drainage.
Airstream Low Point Drain Valve
If your Airstream has an internally mounted fresh water tank, the drain valve may be located inside of the cabin, underneath a panel just like the Jayco’s.
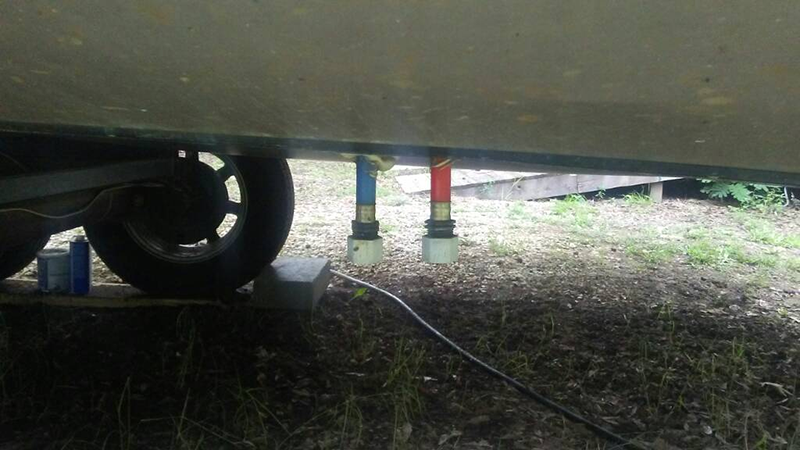
If you own an externally mounted fresh water tank underneath the travel trailer, there will be two metal pipes with a plastic valve. These are not always color-coded like on other systems, but the operation is much the same. Turn the level 90 degrees until it’s in line with the main tubing to drain, and turn the level perpendicular when you’d like to close it.
Winnebago Low Point Drain Valve
The location of the drain valve on your Winnebago RV may differ based on the model. Two popular locations are below the water pump, as well as underneath the last storage bin on the passenger side. Always consult your owner’s manual to determine the exact location of your low-point drain valves.
How To Extend Your Low Point Drain Lines
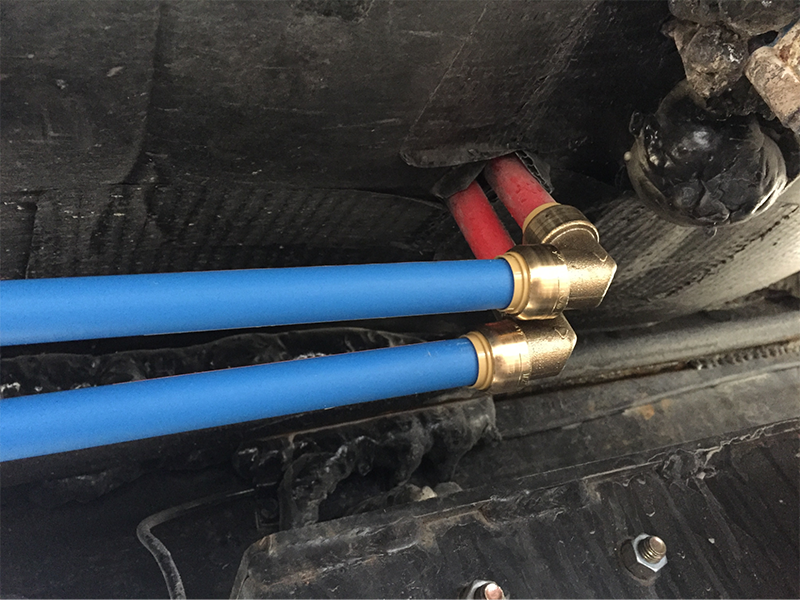
Low Point drain valves are not always placed in the easiest to access locations. Luckily, these drains are almost always connected to a malleable PEX line, making alterations incredibly simple. The process of extending your drain lines is as follows:
- Using a pair of PEX line cutters, snip off the tubing just above the drain valve.
- Attach a 1/2” 90-degree elbow joint overtop of the existing tubing. Crimp down with your PEX crimping tool.
- Add your desired line length to the opposite end of the elbow joint, being sure to crimp down.
- Add a 1/2’’ drain ball valve to the end of this tubing; crimp down.
- Finally, attach the excess tubing to your RV’s frame with zip ties or a similar fastening device.
How to Open Low Point Drains on an RV
Opening your low point drains on your RV is a very simple process and normally requires zero tools. Each manufacturer makes their valves a little different while utilizing the same concepts.
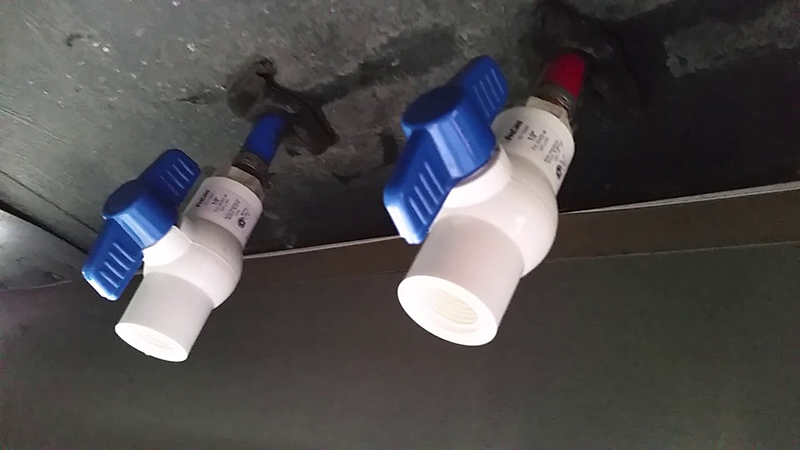
Normally, there is a plastic valve that must be aligned parallel with the drainage tube to let water flow. These may be a generic black or white valve, but in some systems, they are a rubber-coated metal valve. In rare situations, your low point drains may not have plastic valves and will require an adjustable metal wrench to open.
Closing RV Low Point Drains
Closing your RV drain valve is just as simple as opening it – simply reverse the process. Valves are normally placed perpendicular to the drainage tubing to close, as this turns a ball inside the valve to block the water flow.
How to Drain Your RV Fresh Water Tank

Draining an RV fresh water tank is very similar to draining the low point valves, and it is often located in a similar spot. First, locate your RV fresh water tank, and search for a grey or white valve/tube connected to the tank. Unlike the low point drains, this will not be color-coded, and there is normally only one drain valve available.
Open this drain valve, as well as your low point drains, and turn on all faucets in the RV. Additionally, be sure to continuously flush your toilet until water no longer fills up in the bowl. When you see no more dripping, you’ll know your tank is empty.
Note: Never run your water pump when the fresh water tank is dry, as this can severely damage its operation.
How Do You Drain Your RV Water Heater?
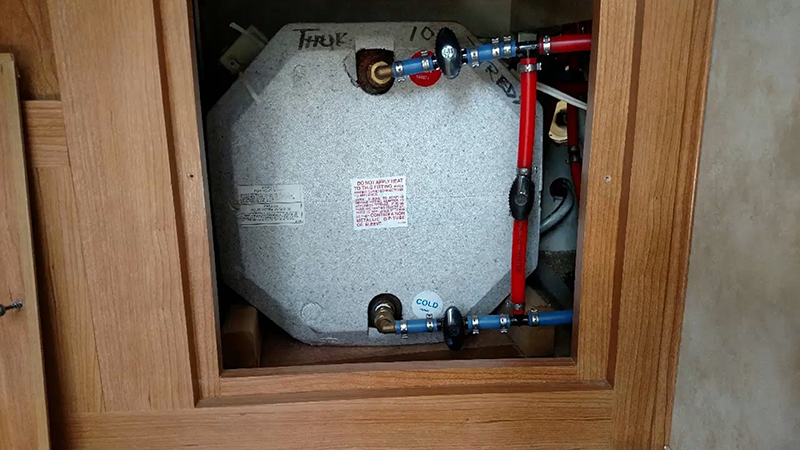
Draining an RV hot water tank is just as easy as the fresh water. The first step in doing so is to turn your water heater to “bypass”. This will ensure that water doesn’t stay trapped within the tank, allowing the water to flow through instead.
Open all of your low point valves (particularly the red one), turn on all faucets and shower heads, and let the water drain out. You may want to attach an air compressor to the city water line to ensure maximum drainage.
Conclusion
Maintaining your RV’s water system is imperative to keeping it operating at full capacity. If living in your RV full time, most experts recommend flushing and fully draining your system around four times a year. If you’re letting your RV sit in storage all winter, it is even more important to do a thorough drain, in combination with anti-freeze, to prevent any pipes from bursting.
Using your low-point drain valve is the surest method of completely emptying your RV’s water lines. Extremely easy to locate, these drains are quickly accessible and require very little knowledge, skillset, or tools. If you’re ever in doubt, always consult your owner’s manual for the most up-to-date information.
With this guide, you have everything you need to know to keep your RV water system healthy!