For most RVers, renovations tend to focus on the same typical sections of the rig. Flooring is the most often upgraded portion, with stick and peel vinyl flooring being a popular choice. Along with this, the RV kitchen is also a high area of focus, with countless options for new countertops, backsplashes, and practical accessories.
Where else can the thrifty DIY RVer look to modernize their living space? Upwards! Your RV ceiling is a canvas just waiting to be renewed. Let’s examine all of the details you need to know before you take on your RV ceiling renovation, along with the most popular options people like you are going for today.
Contents
- Why Would You Want to Alter Your RV’s Ceiling?
- How Much Will an RV Ceiling Replacement Cost?
- What Tools Do You Need to Replace RV Ceiling Panels?
- Considerations To Make When Replacing Your RV Ceiling
- Let’s Look at the Top Renovated RV Ceiling Ideas
- Using Tin Tiling
- Shiplap
- Painting
- Wallpaper
- Fabric Ceilings
- Wood Paneling
- Foam Panelling
- Repurpose Vinyl Flooring
- Other Quick Alternatives to Spice Up Your RV Ceiling
- Have No Fear! RV Ceilings Can Be Easily Replaced
Why Would You Want to Alter Your RV’s Ceiling?
The ceiling of your RV is often overlooked as being a mainstay, undeserving of any modernization. This doesn’t have to be the case! Your ceiling can be a beautiful spot for complex and simple changes.
In general, there are a few reasons why most RVers would want to update with a new ceiling. These include:
- Livening Up the Space: With some fresh paint and texture, your RV can go from looking pretty drab, to pretty incredible.
- Opening Up the Space: The typical RV ceiling is very sterile and clinical in nature. By adding some unique ceiling materials, you can easily add personality to your RV, while also creating a bigger feel to it.
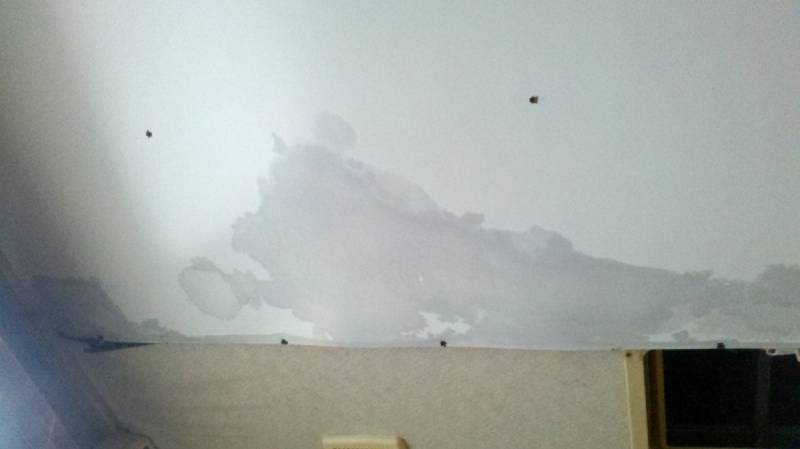
- Damage Repair: The final, and most unfortunate reason for altering your RV ceiling is for damage mitigation. If you’ve suffered a water leak, your first step is repairing it. Once this is done you might be left with some unsightly water stains on your ceiling. With just a small renovation process, you can easily revamp the look of your RV ceiling.
How Much Will an RV Ceiling Replacement Cost?
The cost of your RV ceiling replacement will depend on a variety of factors. First off, you should consider the size of your rig and how much camper ceiling material you’ll need. The more square footage, the higher the bill.
In addition to this, the cost of the material itself can quickly add up. Make sure you know a rough figure before committing to this project, as once you start you’ll have to finish. In addition to the ceiling materials, you’ll need to account for the cost of adhesives and hardware like screws and nails (if needed).
A wooden shiplap ceiling will always be the most expensive option, and you can expect to pay around $2.50-7.00 per square foot. Cheaper options like faux tin and fabric can cost you as little as $1.00-2.00 per square foot. You make the call!
What Tools Do You Need to Replace RV Ceiling Panels?
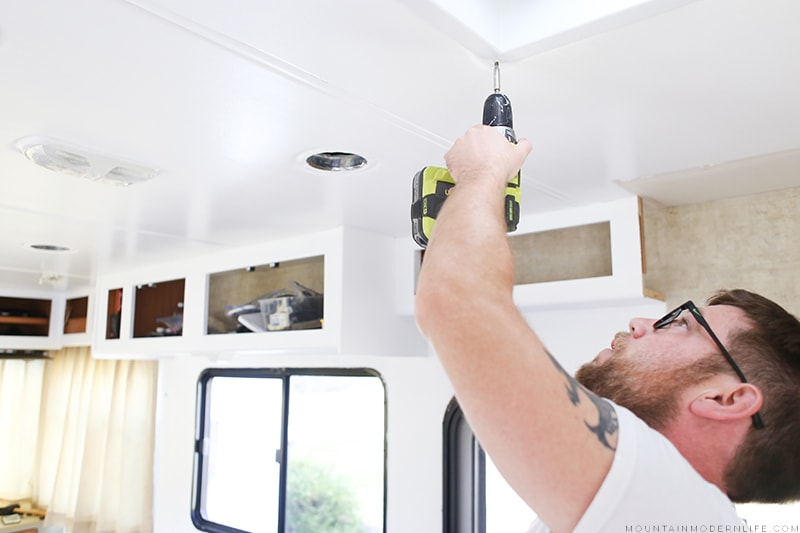
The tools you’ll need for the job are pretty straightforward but can become complicated if you’re installing an elaborate wooden ceiling. If you’re just sticking to lightweight materials, strong adhesive, a ruler, and a sharp razor blade will likely do the trick.
If you’re installing a more permanent ceiling with materials like tin tile, you’ll at least need a hammer and some nails. Wooden ceilings like shiplap and plywood will require power tools to accurately cut your pieces to shape.
Considerations To Make When Replacing Your RV Ceiling
Besides creating a list of tools and materials you’ll need to take on your RV renovation, there’s a variety of other factors to consider. These are:
- Weight: If your camper is already quite heavy and you are approaching your vehicle’s maximum towing capacity, you’ll need to make sure you’re investing in lightweight ceiling material.
- Durability: Don’t cheap out on inferior products! The last thing you want to do is another renovation once your first project fails.
- Ceiling Curvature: If you have a curved ceiling, you’re going to need to accommodate it. If you lack advanced carpentry skills, it’s best to avoid a new ceiling made of wood. Opt for materials that are forgiving and can easily be contoured to the shape of the RV ceiling.
Let’s Look at the Top Renovated RV Ceiling Ideas
There are countless methods that you can take to update your RV ceiling, and there are several guides available out there to help you complete it! A quick Pinterest or Youtube search will easily provide you with everything you need to know.
With that being said, here are some of the most popular RV ceiling renovation ideas grabbing people’s attention!
Using Tin Tiling
Tin tiling is one of the most popular options for the RVer looking to add some character and charm to their rig. Nothing screams classy quite like a shining tin texturized ceiling. Easily purchased at an affordable rate, tin tiling comes with an easy installation process as well. The material is extremely malleable, meaning it can conform to even curved ceilings and requires very little construction know-how to install properly.
Real vs. Faux Tin Tiles
If installing true tin tiling, be prepared to dish out a pretty penny. The real material is quite expensive, but it is still readily available for the determined DIYer. Faux tin tiling is much more cost-effective and normally comes as foam. This can be purchased in bulk quantities at a very affordable rate from most home improvement stores.
The tools needed for these two tiling jobs differ. If going for an authentic tin tiled look, you’ll need to purchase sharp snips designed specifically for tin, as well as adequate hand protection from the sharp edges. Additionally, you’ll need to purchase nails, and you’ll need to be sure that the existing ceiling material is sturdy enough to handle it.
If going the faux tile route, all you’ll need is some sharp scissors and a razor blade, along with the manufacturer’s recommended adhesive or contact cement.
Shiplap
Shiplap ceiling has become a staple of the RV and van renovation movement, and for great reasons! It easily adds a ton of personality to your rig, turning it into a vibrant, but homey farmhouse bungalow.
The biggest challenge with installing a shiplap ceiling is finding materials that are light enough for your RV. True shiplap paneling can be purchased relatively easily, at a cost of about $5.00 per square foot. Alternatively, you can buy planks that are ready to go. These usually come in packs of six 1’’x6’’x8’’ pieces and cost around $100 per package.
Compared to tongue and groove planks, installing shiplap is incredibly easier. Instead of focusing on each plank lining up directly with the groove, you can simply attach it on top of the lip – which is much more forgiving! And if purchasing true shiplap is out of the question, you can easily craft your own with some carefully measured and cut strips of wood.
Painting
If your RV ceiling is in pretty good shape, simply adding some fresh paint to it can do wonders! This method is not recommended if you’ve suffered any sort of water damage or delamination, as the fresh paint will simply not last. While the paint may hold for some time, eventually it will crack and deteriorate just like the old ceiling.
However, as long as your ceiling doesn’t have any massive damage, paint on! With so many color options, you’re sure to find something that fits in nicely with the decor of the rest of your camper. Just be sure to cover everything you don’t want paint dripping onto! Additionally, with paint, preparation is key. Make sure to sand down any uneven points of your ceiling, and always adequately prime. If you cut corners with painting, your project will drastically suffer down the road.
Wallpaper
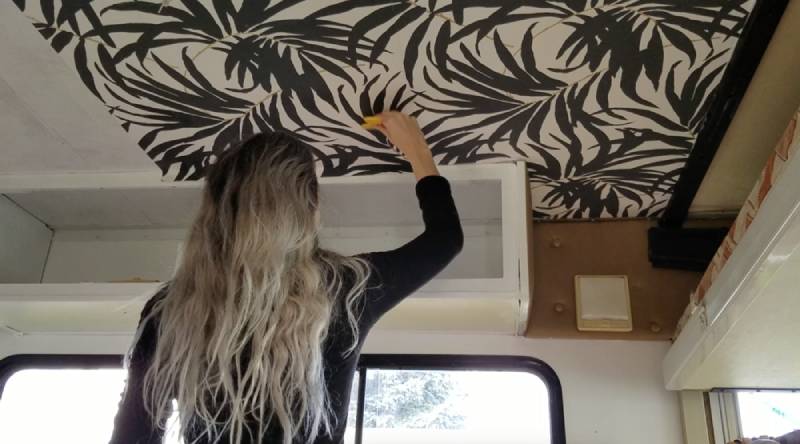
Along with painting, adding wallpaper is another simple ceiling renovation that doesn’t require a whole lot of skills or manpower. Like with painting, you’ll need to make sure that your RV ceiling is in adequate shape and doesn’t have a large number of gouges or rough patches, as the wallpaper will simply not stick to it. If your ceiling is in great shape, wallpaper makes for a fantastic lightweight ceiling alternative.
The materials needed for adding wallpaper are incredibly simple, making it a popular DIYer option. These materials include enough wallpaper to cover your RV, some recommended adhesive, a razor blade, and a straight edge to cut the paper, as well as a roller for smoothing out the surface. Installing wallpaper can be tricky for one person, so consider having someone around to hold up the paper as you smooth it out.
Fabric Ceilings
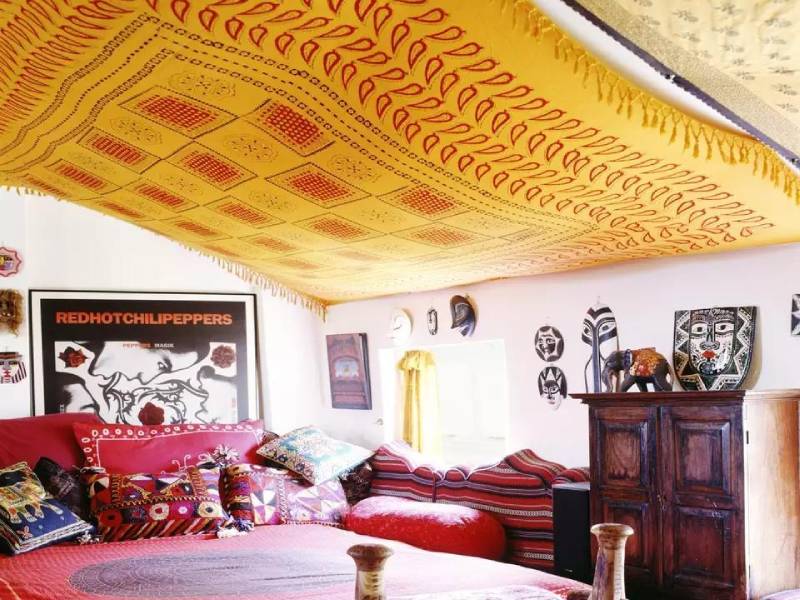
Fabric is another lightweight and low-cost option for renovating your RV, and it can be easily installed in two ways. The first is by applying adhesive to the underside and smoothing it out across your RV ceiling, taking care to avoid any edges around the vents. The second is by draping the fabric and attaching it to the ceiling with staples in just a few spots. This will give a much more flowy, texturized aesthetic.
The downsides to fabric ceilings are numerous. Depending on the material used it can be extremely hard to clean. Unlike a sturdy material, you won’t be able to vigorously scrub away. On top of this, with all of the condensation an RV produces, the fabric can easily become a breeding ground for mold and mildew. Not a fun situation!
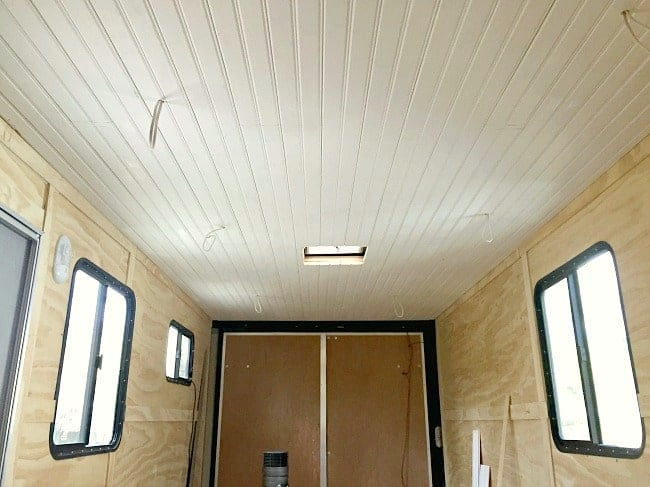
Wood Paneling
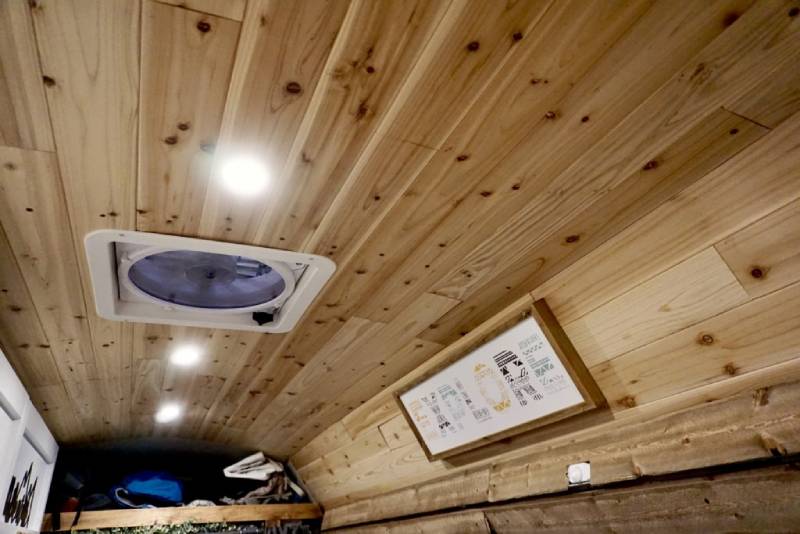
Adding wood paneling to your RV ceiling is the best way to make it pop. Wood always has a very clean, minimalist appearance to it and can easily make your RV feel like home. Wood paneling is relatively affordable and can be easily obtained at any home improvement store.
It also comes with an immense amount of design flexibility, as you can easily stain or paint it to match the rest of your RV’s design. Wood is also incredibly easy to size to your RV ceiling, so long as your measurements are proper.
Downsides to a Wood Ceiling
As picturesque as a wooden ceiling is, it also comes with a list of disadvantages. Firstly, wood is extremely porous and susceptible to water damage. If you’ve had any issues with a leaky roof in your RV, it may be wise to choose another material option.
Installing wood paneling also involves more complex carpentry and DIY skills than other materials listed here. You’ll need to properly measure and cut every piece with power tools, and you’ll also need to securely fasten the wood to your ceiling with nails or screws – adhesive isn’t going to cut it here.
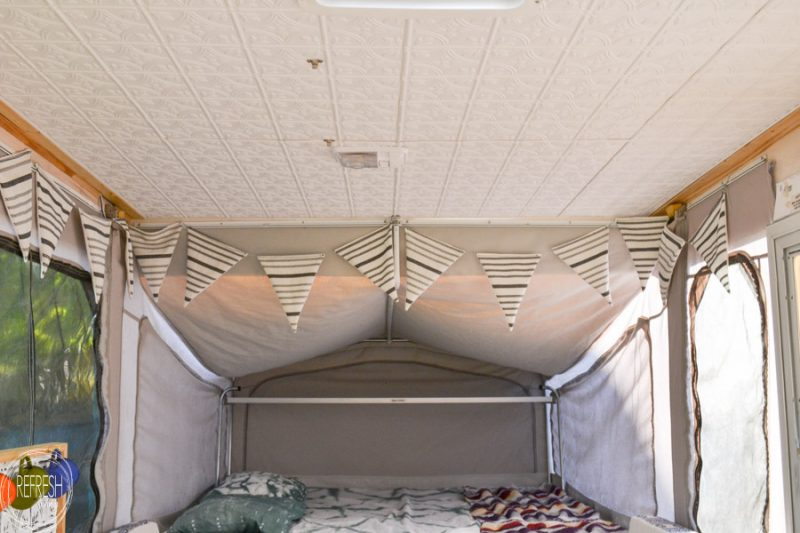
Foam Panelling
If wood is out of the question because of weight or moisture issues, foam paneling is your next best option! You can even select style options that resemble wood or shiplap, and these can be easily glued down with the proper materials. Foam has the added benefit of improving sound quality within the RV, as it has dampening properties. It makes a great option for those looking for an in-between budget of around $4.00 per square foot.
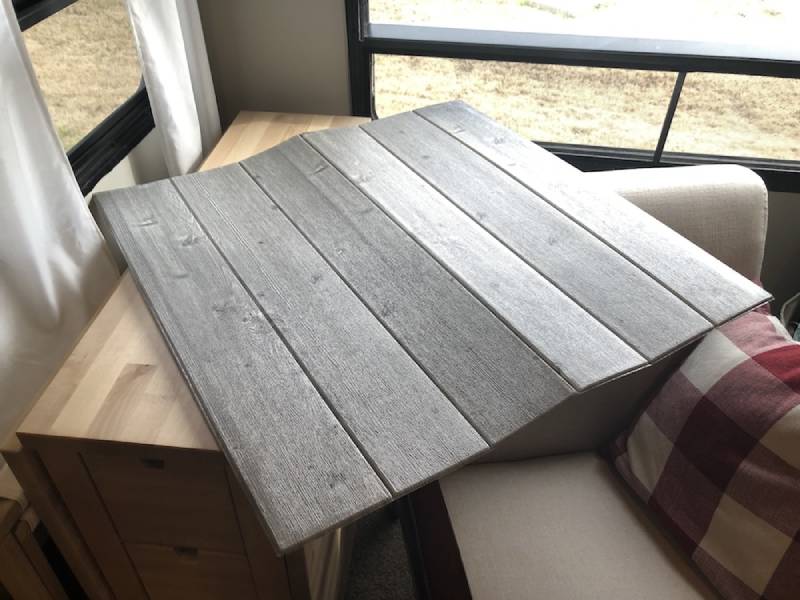
Repurpose Vinyl Flooring
Vinyl peel and stick flooring has always looked good on the bottom half of your RV, but did you realize you can put it on the ceiling as well? Vinyl flooring is extremely durable, very easy to clean, and installation is a breeze. After cleaning and preparing the ceiling, simply stick on the panels, working your way from the inside out. This will create a nice staggered appearance with no harsh lines.
The best part about vinyl flooring planks is that you can easily replace any trouble pieces that have failed to hold up after some time.
Other Quick Alternatives to Spice Up Your RV Ceiling
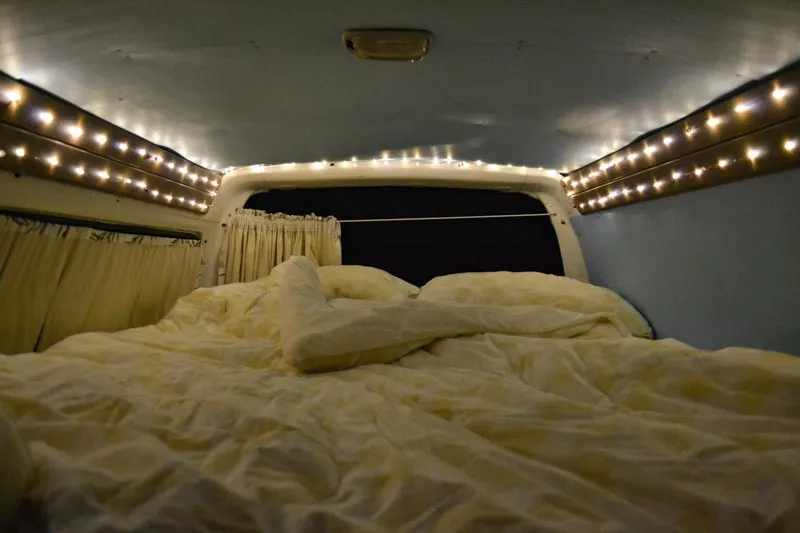
Even if you’re not feeling like taking on the task of a huge ceiling RV renovation, there are countless things you can do to spruce up your home. Consider hanging string lights and fake vines from the ceiling to give the space a more airy feel. You can also add sticky, push to turn on lights in areas that just need a little more illumination.
Consider adding a hanging net along the lengthier portions of your ceiling if you need just a little extra room for storage, such as for a surfboard or extra linens. In addition, a beautiful eye-catching tapestry neatly draped over your ceiling adds a huge touch! Think outside the box and get creative.
Have No Fear! RV Ceilings Can Be Easily Replaced
If you find yourself stuck looking at a nasty, outdated ceiling in your RV, take some action and change it! While RV ceilings are easily overlooked, they contain an immense amount of design potential. Better yet, the renovations need on a ceiling are often much less labor-intensive than other portions of your RV, and there are even options for those not looking to install complex materials.
With just a little bit of self-confidence and some big ideas, your RV ceiling will be looking like it’s straight out of Better Homes and Gardens in no time.