An RV has all the features needed for a person to feel at home when traveling across the country. Owning an RV is also a matter of pride for campers around the country.
However, spending quality time in an RV or living in it could become challenging when it comes to waste management. One of the necessary conditions of RV living is the proper disposal of household waste materials. So, it will come in handy for every RVer to know how to build a RV septic system.
Contents
What Is a Septic Tank?
The term “septic” denotes the anaerobic microbial decay of wastes. These are mostly located underground. Concrete, fiberglass, or thick plastic tanks are widely available as septic tanks. The tank holds the solid and liquid waste and natural microbes help with decomposing wastes.
Periodical emptying of a septic tank is necessary. The natural decaying of waste is time-consuming, and eventually, the tank fills up with domestic discharges. Due to its importance in an RV, campers cannot deny the necessity of knowing how to build a RV septic system.
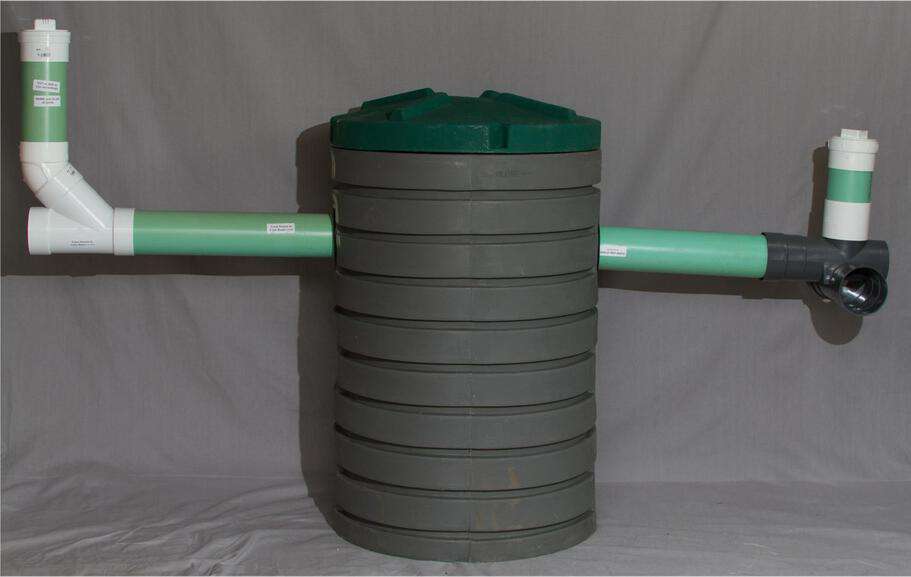
Structures of a Small RV Septic System
A small septic system for travel trailer varies from simple to complicated, but all models share some basic components. Most RV septic tank systems will at least have a:
Gray Water Tank
The water from the kitchen sink and shower goes to this tank. This water mainly contains soap as contaminants. It is devoid of solid and liquid waste in the trash disposal or toilet. It is not potable water but you can use it for cleaning the RV or the black water tank.
Black Water Tank
It is the primary waste dumping tank inside the camping vehicle. A blackwater tank houses all the domestic solid and liquid wastes flushed down the toilet.
Dumping System
A wastewater dumping system is an infrastructure of pipes and hoses built within the RV. It facilitates the discharge of gray and black tank contents into a dumping facility within the campground.
How to Build a RV Septic System: Fifteen Simple Steps
Building a small homemade septic system for RV is easy. It is just a scaled-down model of regular large septic systems found in brick and mortar homes. It is important to know more about local zoning laws before constructing the septic setup.
A. Requirements for the Construction of a Small Septic System
While knowing how to construct a small septic system, you must have knowledge about the requirements for the septic system.
- PVC pipes (work as a conduit to transfer wastes from one place to another)
- PVC elbows of different angles (for plumbing needs)
- A shovel
- Paper rosin (for flooring purposes)
- Measuring tape (for measurement purposes during the construction of the septic system)
- PVC cement or pipe glue (to fix PVC pipe elbow joints)
- Perforated PVC pipes
- A small septic tank for RV
B. Construction Steps for How to Build a RV Septic System
Step 1
In the beginning, locate the main pipe for sewerage purposes in the RV. It should be at the automobile’s backside and beneath the trailer, where black and gray water tanks are available. Refer to the RV manual to know the exact location.
Step 2
There will be a plumbing pipe in the RV. It generally extends horizontally sidewise of the RV and plugged into the vehicle using a clamp. The opening stays sealed with a lid. Open the cover and connect a 5 to 10 feet long PVC pipe. First, get to know the plumbing pipe’s diameter before purchasing PVC pipe for the above purpose.
Step 3
At this step, get a tape measure and calculate the distance between the tank inlet hole and the tank bottom. Use the same measuring tape to know the depth of the hole from the bottom of the pipe.
Step 4
Use a shovel to dig a dump hole. The diameter and depth of the hole should be according to the figures from the 3rd step. Now, set the tank in this hole. It is the septic tank that will separate liquid and solid waste.
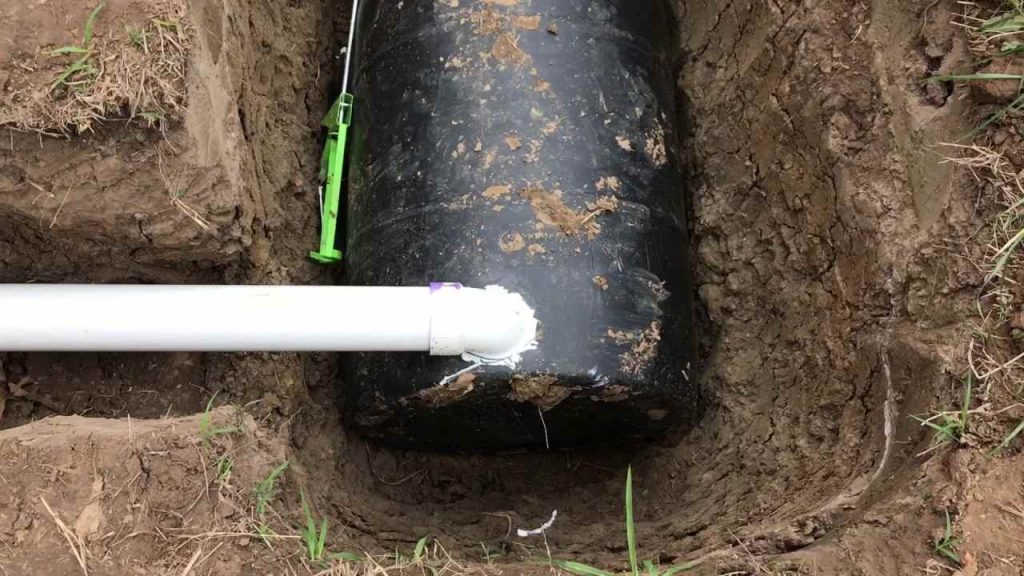
Step 5
Now, connect the other end of the PVC pipe to the septic tank. The PVC pipe from the 2nd step will connect the RV waste discharge pipe with the septic tank. Inspect the connections to make sure that there are no leaks.
Step 6
Fill the septic tank sides and the hole with dirt.
Step 7
Use an elbow pipe and use PVC cement to fit the line on the drainpipe’s end. The elbow pipe should look face down in the way of the septic tank bottom.
Step 8
Now, excavate a ditch 10 feet deep alongside the opening hole near the septic tank’s end. Make a slope of about 1/8″ per foot. Connect a PVC pipe from the septic tank outlet to the trench’s depth.
Step 9
At this stage, dig a hole at the end of the trench.
Step 10
Block the holes with a few stones and then fill the hole alongside the pipe end.
Step 11
Now, find a 4″ punctured PVC pipe and fit it on the PVC pipe’s hard end. The perforated PVC pipe needs to end in the midpoint of the hole filled with stones. Make a slope of 1/8 of an inch per foot.
Step 12
Put gravel over the perforated PVC pipe. The stone chips around the line should be four inches over it.
Step 13
Place rosin paper over the gravels so that mixing up dirt with stones can be stopped. Put an extra layer of soil over the rosin paper to complete the covering process.
Step 14
Now, set the lid on the septic tank. The cover of the tank will prevent odor from spreading in the camping area.
Step 15
Fill the trench with dirt to complete septic tank construction.
Conclusion
The RV and surrounded camping area could become highly unhygienic without a proper septic system. Therefore, constructing an RV septic system has many advantages. By following how to build a RV septic system steps, you can quickly set up a wastewater septic tank. It helps in situations during remote camping when there are no dumping stations nearby.
The first step should be to get a permit from local or state authorities. Soil conditions and groundwater elevations significantly affect the drain field size and elevation. Improper or illegal installations can create environmental hazards.
Why do you think even the discharge of gray water on the ground is illegal in parks and boondock areas?